|
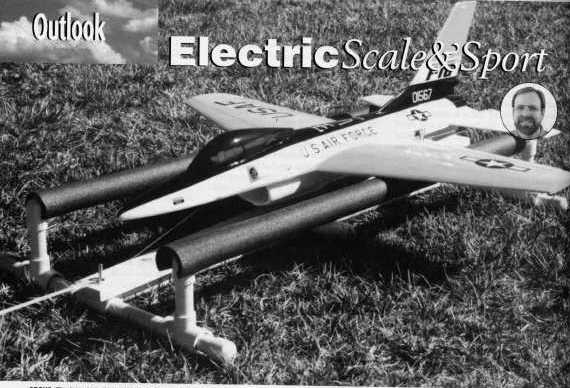
Adjustable Pedal Launcher
The launcher system is pretty straightforward. I think you'll be able to figure it out by looking at the photos. Everything is made from standard PVC pipe. Bob used the basic dimensions from the S&E Pedal Launcher plan #137. He built a launcher from that plan and later made the PVC version so he could adjust its width. It is built from 3/4-inch pipe with the exception of the "T" fittings. They are designed to slide to adjust the launcher's width. I recommend you "dry fit" everything to check for proper operation. Once you're sure everything operates smoothly you can glue A the joints securely. The top rails are padded with foam pipe insulation.
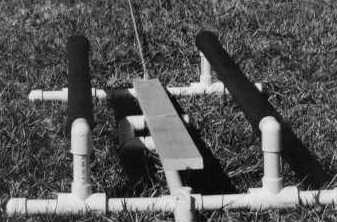
Photo #1 shows the launcher from the top. You can sec the basic frame is an 'T' shape with a center pivot arm that the wooden pedal rotates on. The first thing is to decide how big yen want your launcher to be. Since the width will be adjustable, the length will depend on the size of the plane you will be launching.
Photo #2 is a side view. Bob has made the front legs slightly higher than the rear. This gives a slightly nose-up launch that helps keep the plane from taking a quick skim across the ground as it accelerates off' the launcher. Nothing scientific here, just "that looks about right."
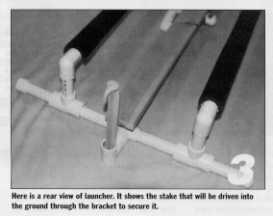
Photo #3 is the back of the launcher. This is the end you stand behind. The stake will be driven into the ground through the modified tee that it's standing in- This tee is mounted vertically and the bottom is cut off flush with the ground. Remember to secure the stake or the launcher will be the first thing down-range when you hook-up the bungee. Be sure the joints are securely glued.
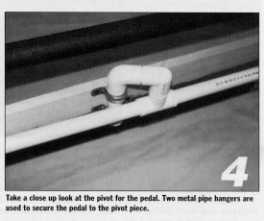
Photo #4 details the center pivot. The lx3 wood pedal is affixed to the pivot using standard metal pipe supports. Once again, be sure the joints of the PVC pivot arm are glued together. The exact geometry of the pivot point isn't critical, but Bob placed it slightly towards the front. This make the leverage a bit easier when you step on the back to release it. You also don't want the front of the pedal to go high enough to contact the plane when it slides up the rails. Check all the clearances before final gluing.
Photo #5 lets you see how the adjustable slides work. They are Ixlx3/4 tees, so they slide over the 3/4-inch legs. It may seem like they are a bit loose, but when the assembly is staked to the ground they will stay in place. You can also sec the front pin and how it fits up through the front of the pedal. This is a bolt with a long, smooth shaft. It is epoxied into the front tee on the main frame. Bob cut the threaded end off so it would be smooth for the ring to slide over.
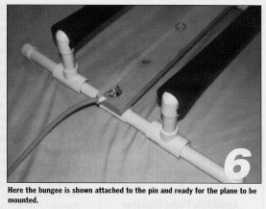
Photo #6 gives you another view of the front. This is how it will look when you have it loaded up with a taut bungee. The end of the bungee bas a steel ring that slides over the pin. If you haven't secured the launcher to the ground with the rear stake, yen can now go down-range to retrieve it. Assuming all is still in place, you can take the leader from the trigger ring to the book-up ring and attach the plane.
I think this is the safest way to bungee-launch a plane. Both of your hands are on the transmitter and your controls when the plane is released. There are no surprises and no weak throws. The day we tested the launcher it worked so well 1 almost forgot to turn on the motor after the Speed-400 Shrike left the launcher. It had plenty of flying speed. 1 was so surprised 1 almost became a spectator.
We've used it for Kyosho jets and small deltas. It's a great launcher that will last forever. It doesn't weigh much, so it's easy to transport. However, I can't over-emphasize how important it is to STAY CLEAR of the bungee of any launcher, If anything goes wrong you don't want that giant rubber band or a launcher to smack you.
A lire pour votre plaisir uniquement. J'ai mis toutes les informations pertinantes en Français sous les photos.
Partie du texte de l'article d'écrivant la construction.
|