|
Catapulte simple avec pédale de déclenchement sur la rampe |
|
PRINCIPE Catapulte avec pédale de déclenchement sur la rampe |
 |
|
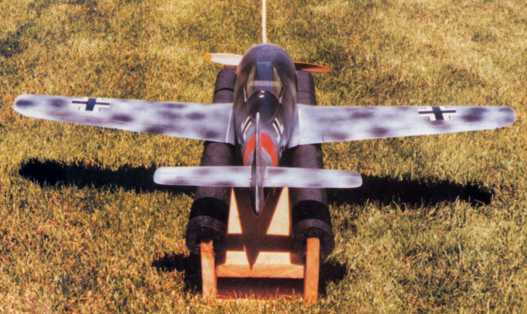
Vue de l'arrière
Je ne l'ai pas construite, je vous donne les caractéristiques tel quelles ont été décrite dans la revue S&E Modeler Cette rampe est construite à l'aide de 4 planches identiques de 16cm de large et 2,5cm d'épaisseur de 90cm de long pour petit avion, de 120cm pour plus grand En fait, choisissez en fonction de la taille de votre coffre voiture |
 |
|
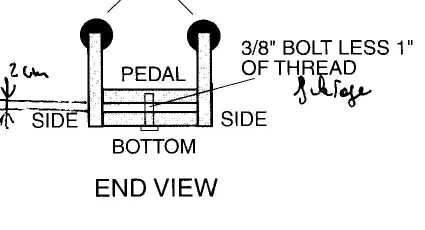
Vue de face |
 |
|
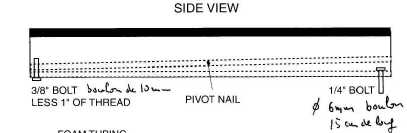
Vue de coté
A droite le boulon de 15cm est pour tenir dans le sol personnellement je pense que cette solution donne une gêne pour le transport je préfére avoir une planche du fond 5cm plus longue avec deux trous pour passer des piquets de toute manière il faudra emporter le marteau. A gauche, le boulon, qui retient l'anneau, sera limé, pour faciliter le décrochage de l'anneau |
|
Notons, enfin, qu'il n'y a pas d'angle de décollage |
|
Article décrivant la construction
dans S&E Modeler numéro V4N5 Septembre 1999 plan #137 coût $12 coût fabrication $70 PO Box 4250 W. Richland WA 99353 (866) 627 0456 |
|
Partie du texte de l'article d'écrivant la construction.
A lire pour votre plaisir uniquement. J'ai mis toutes les informations pertinantes en Français sous les photos. Assuming you have the four 1x 6x 36-inch boards cut to length, take two of thern and clamp them together one on top of the other. Measure 2 1/16 inches from one end and drill a 3/8-inch hole through the center of the boards. Now, take the clamps off of the boards and enlarge the 3/8-inch hole in» one of the boards to 3/4-inch and setId aside. At the opposite end of the board that has the 3/8-inch hole, center drill a 1/4-inch hole set in 1 inch. Next, using the board that has the 3/8-inch hole at one end and the 1/4-inch hole at the opposite end as the bottom of the launcher, take the two remaining boards and make a three sided box or a channel out of them. This means you will have a bottom and two sides. Make sure the bottom board has the 3/8-inch and 1/4-inch holes in it. Secure the sides to the bottom board using the finishing nails. Refer to the drawing. |
|
|
|
|
|
|
|
|